A few days ago I saw this blogpost by Scott Haneselman “Microsoft Teams Buttons for Stream Deck to Mute, Share, Hang up, and Manage Cameras” and I’ve found it fascinating and a great use of the Elgato Streamdeck. There is only one little catch.. the price. The elgato stream deck starts about ~150 Euro and about the same in dollars, which is kinda expensive for my budget, so I went thru my drawers to find my old Arduino set. it contained some buttons and some wires, which is exactly what I needed! (And also the whole set cost me about ~50 Euros)
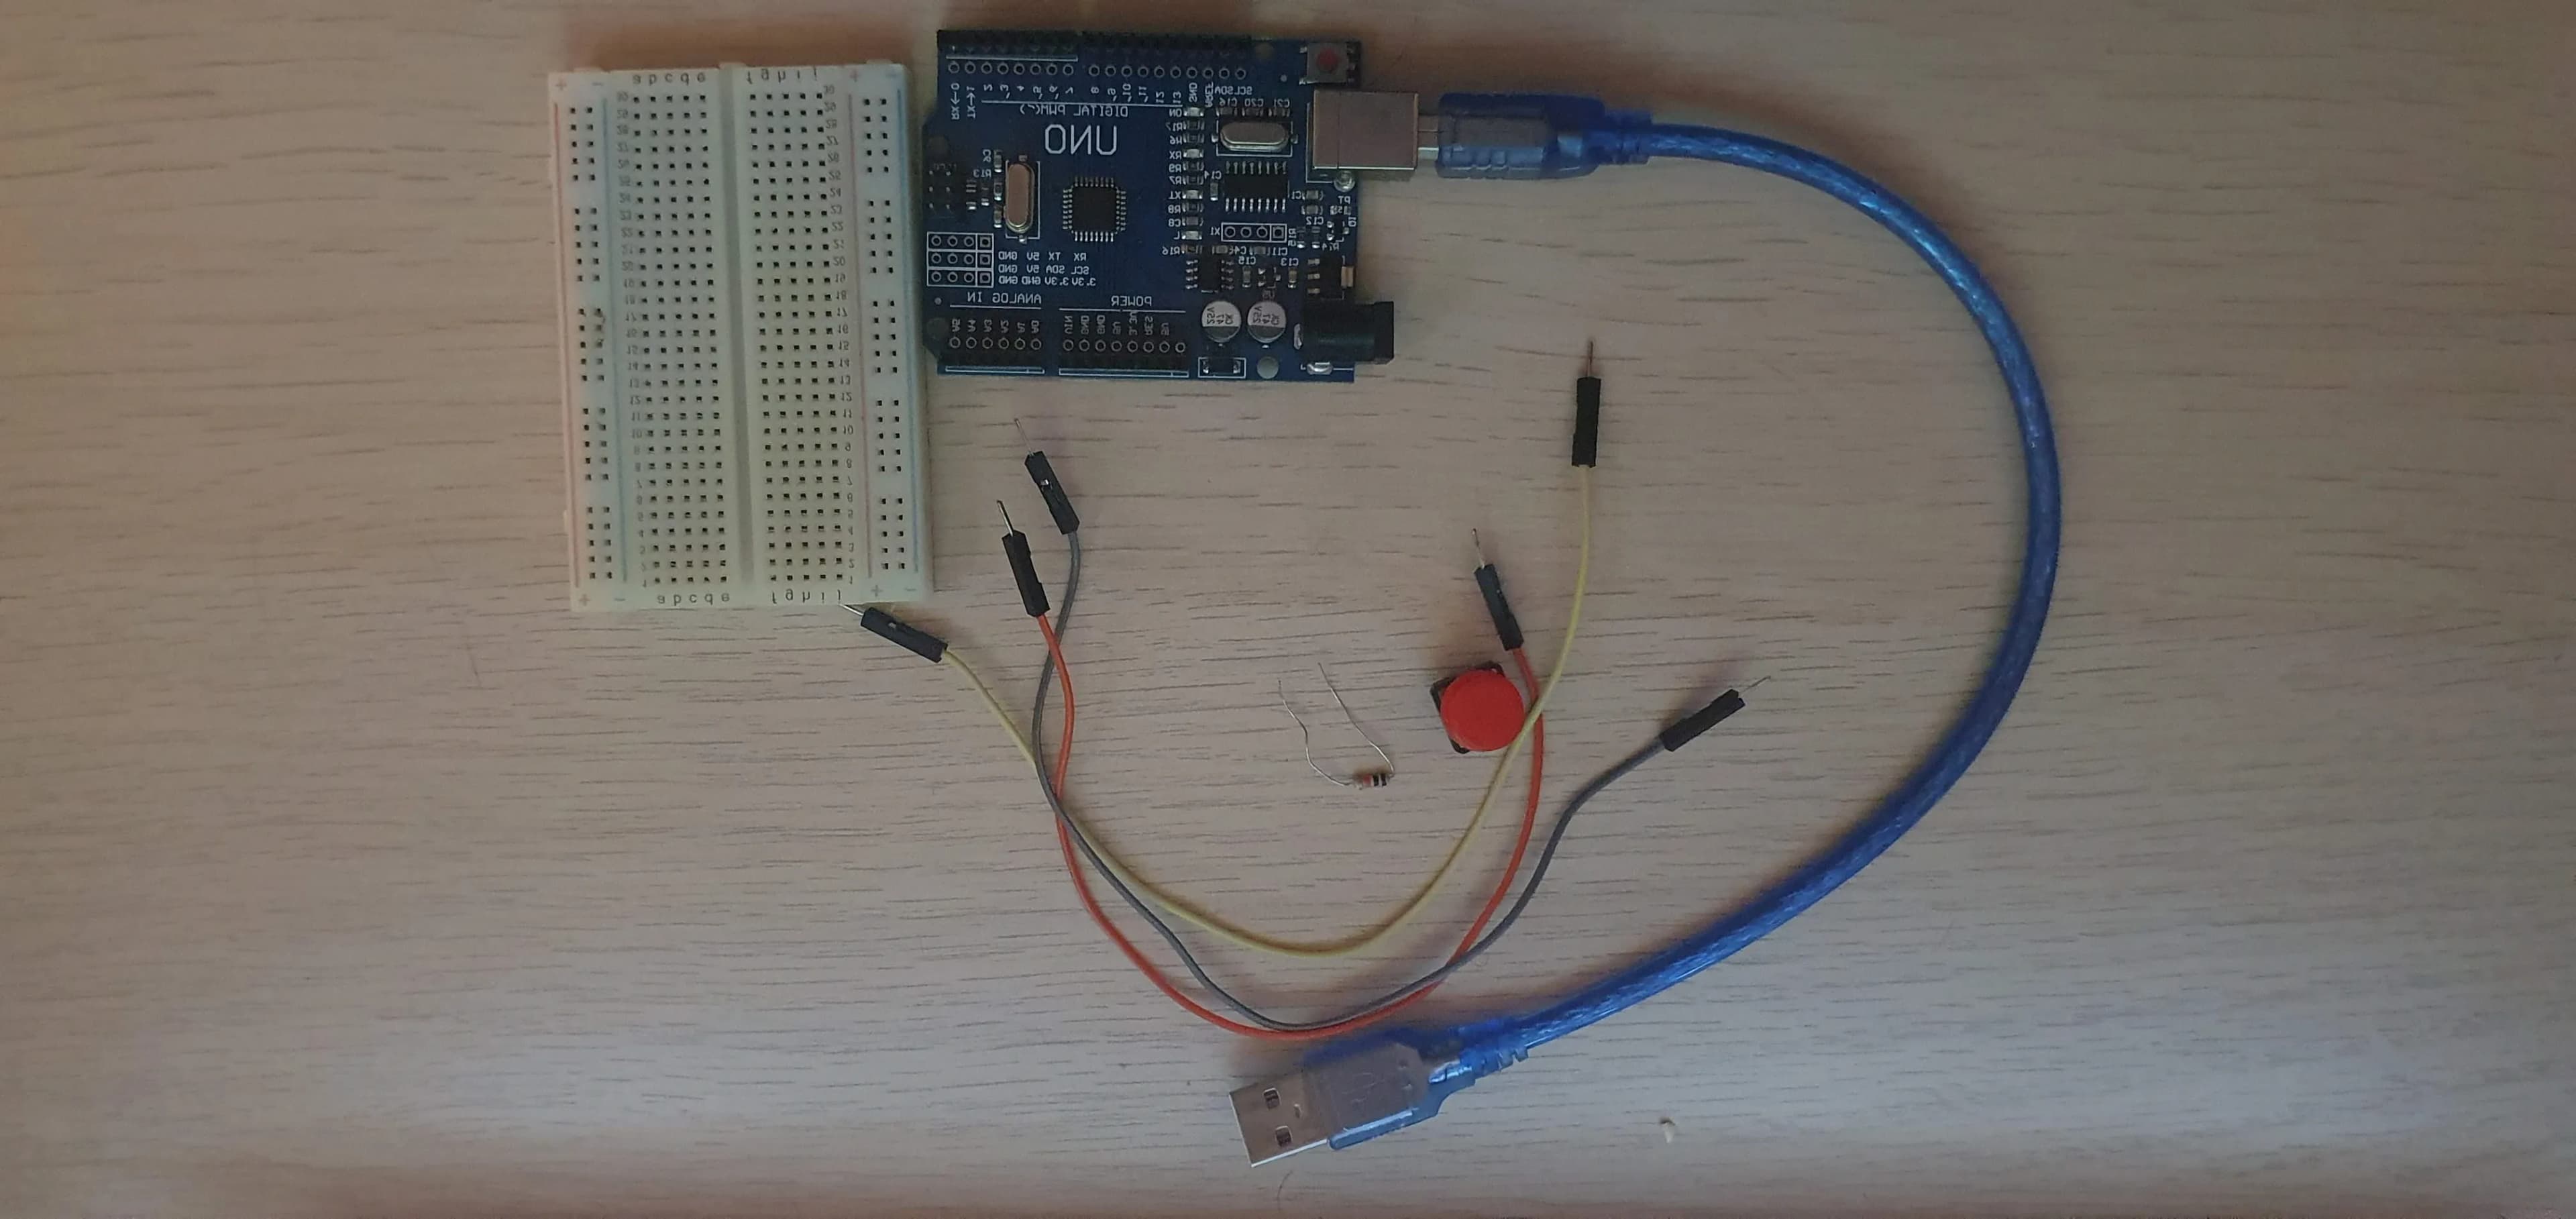
Parts I’ve used here:
- Arduino board
- Cables
- Button
- Breadboard
- 10k Ohm Resistor
First steps
So, the first step was figuring out what language to use to make this work. Originally I thought, it would be nice to use GoLang or Rust since I want to get into these languages in the future, however after some thinking about it I naturally, like every hipster developer, settler for JS. It is probably not a good idea to write microcontrollers with JS but in this case, it should be easy to use and reproduce for everyone, I think JS is the best option.
What I recommend using is Johnny-Five which in short is a library that helps us communicate with the IOT devices like Arduino and Raspbery pi. In order to communicate with the host device, it realies on the firmata-protocol. In the case of an arduino a program is flashed to the arduino that bootstraps and runs firmata, accepting instructions over a serial connection. With the Raspberry Pi it uses raspi-io, which uses a firmata-compatible API. It has the downside of requiring a serial connection to run your code.
Now, to start with the project I’ve just lookup some of the examples found in the on the Website of johnny-five which helped me connect the arduino with the breadboard. After that I had something like this:
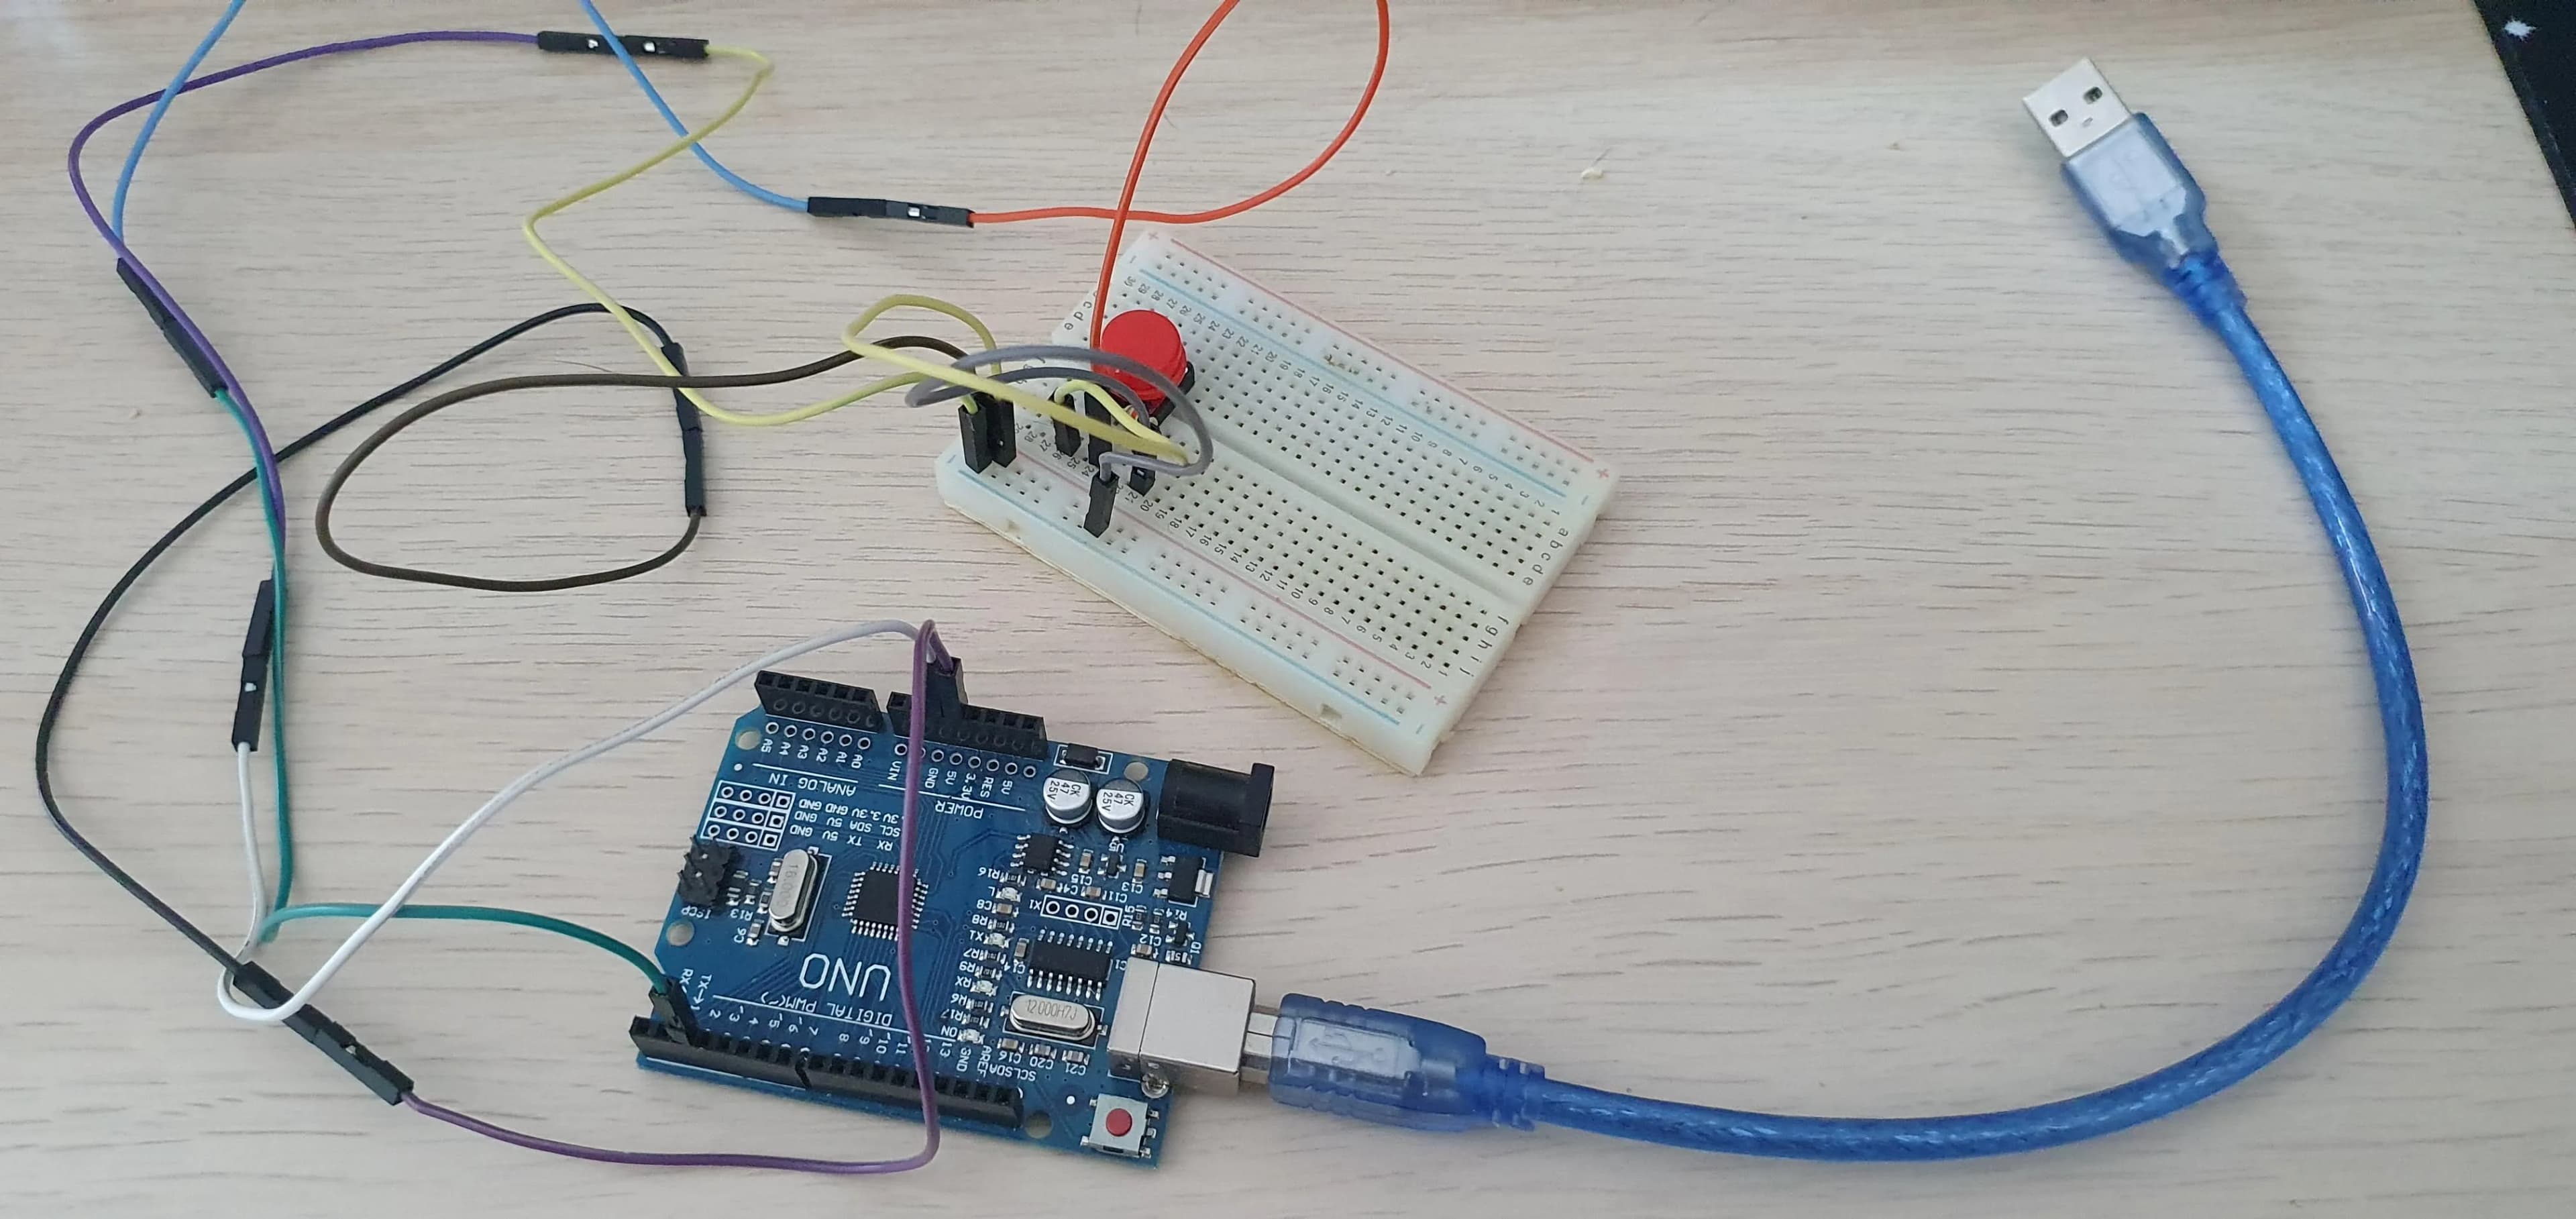
Note: I’ve used some extension cables to make the reach a bit longer, since my USB cable is too tiny and connecting to the back of my PC results in me having to stretch, if I did not have the extensions.
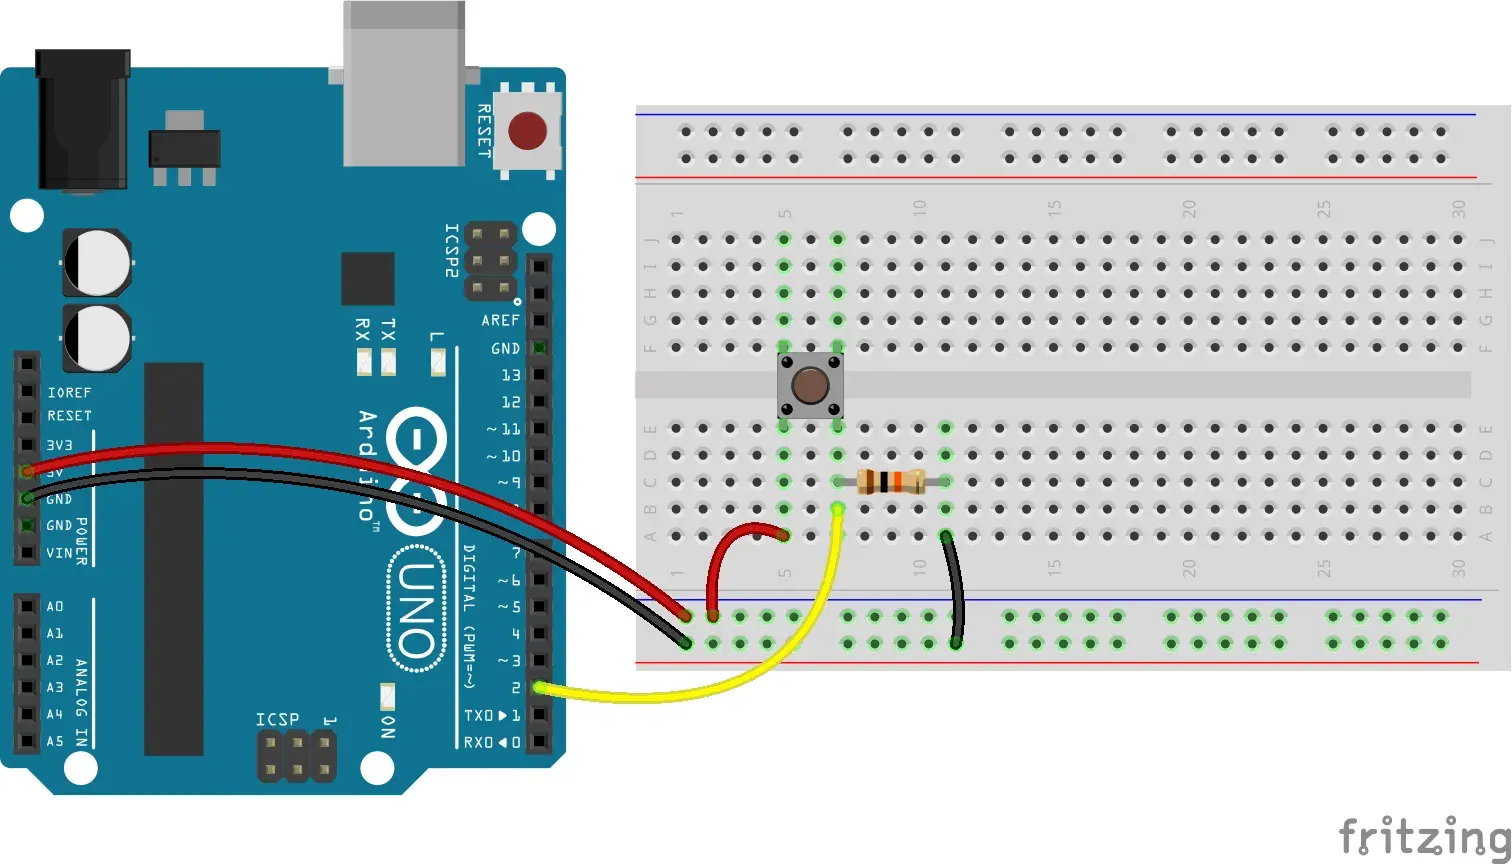
Here is maybe a better look at the board schema and how to connect a button to it:
Loading the firmware
After connecting with the breadboard, connect the arduino to the PC and we can start with the fun part!
First off we start the Arduino IDE and configure some things.
- Select the correct Port Tools > Port (the correct port is 3 or above)
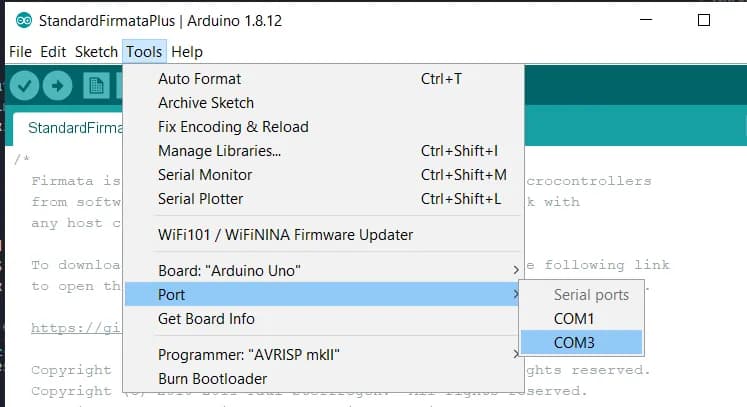
- We will need this to flash the firmata protocol Files > Examples > StandardFirmataPlus
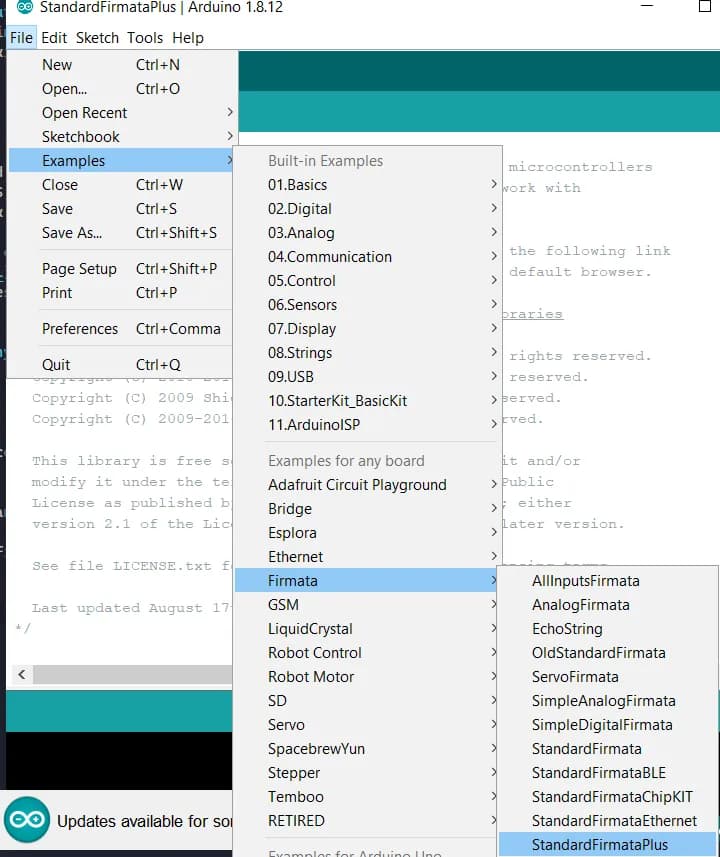
** ATTENTION ** Let me stop here for a second - If you, like me, have a knockoff arduino and you are not seeing any port besides the default one, you have to install a specific driver which can be found here. Thats me saving you 3h of googling what the issue is, you are welcome.
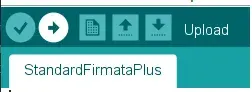
- Just press Upload button, and if everything is configured correclty there should be no errors in the IDE.
- Thats it for the config!
Now that you have Arduino running with a Firmata protocol, everything we have to do is code the JS part of the macro keyboard.
Make a new index.js file wherever you can - write the code for the keyboard, should look something like this:
var five = require("johnny-five"),
  button;
var robot = require("robotjs");
var board = new five.Board({
  port: "COM3",
});

// The Board class constructs objects that represent the physical board itself.
// All device objects depend on an initialized and ready board object.
// Essentially all code you write should be in the board object in the 'ready' event
board.on("ready", function () {
  // Create a new `button` hardware instance.
  // This example allows the button module to
  // create a completely default instance
  button = new five.Button(2);

  // Inject the `button` hardware into
  // the Repl instance's context;
  // allows direct command line access
  board.repl.inject({
    button: button,
  });

  // Button Event API

  // "down" the button is pressed
  button.on("down", function () {
    robot.keyToggle("control", "down");
    robot.keyToggle("shift", "down");
    robot.keyToggle("m", "down");
  });

  // "hold" the button is pressed for specified time.
  //        defaults to 500ms (1/2 second)
  //        set
  button.on("hold", function () {
    console.log("hold");
  });

  // "up" the button is released
  button.on("up", function () {
    robot.keyToggle("control", "up");
    robot.keyToggle("shift", "up");
    robot.keyToggle("m", "up");
  });
});
This code snippet is only for “CTRL + SHIFT + M” (mute / unmute) for MS Teams (I think Discord and Slack use the same button combination for mute and unmute.)
And run it like a node script node index.js and thats it, your button should be working now!
Let me break down the code a little bit. The importat part is this:
var board = new five.Board({
  port: "COM3",
});
You should initialize a new Board with the correct port, since in my case I had to do it, because the default port is not working. Probably because of the knockoff arduino. The port is the same as the one we selected above in the first step!
The pin on the Arduino board should be set here as the button:
button = new five.Button(2);Later you can declare new buttons with the same code, just remember to select the correct Digital pin number on which the button is connected. (Usually from 0 to 13)
And RobotJs is being used to setup the keyboard shortcuts with the down and up events which are triggered when pressing the button. It is just a simple library which simulates the keyboard inputs. This is really the first solution I could find and easiest I could make work, there could be potentially something better, but I’ve settled with what works. Also remember to use KeyToggle function and not keyTap. So you can add additional shortcuts, which make you leave the call or copy - paste, change scenes, essentially almost everything you can do with a StreamDeck.
So, in just a few steps you can have a custom macro keyboard. It is supriseingly not that hard, especially if you have the possibility to write JS and make it work with it.
Later if you are ambitious you can expand this and add more buttons on the board and make something a bit more complicated and it could look like this:
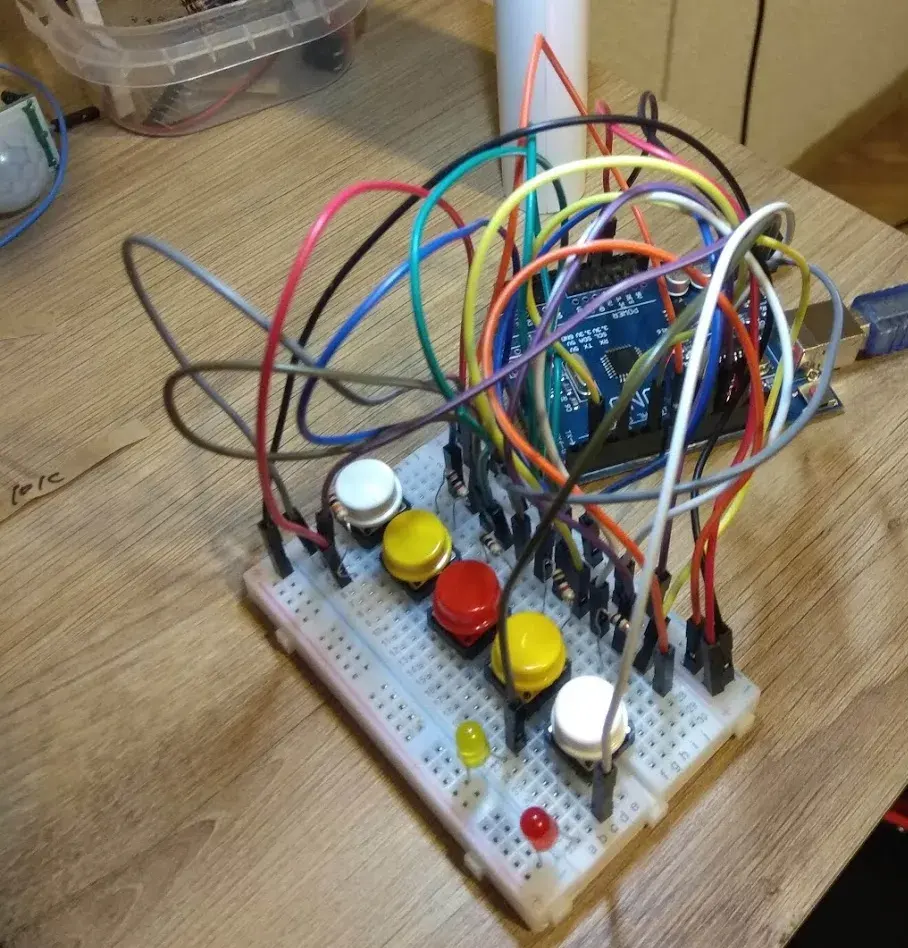
Its not as fancy as the StreamDeck but it is usefull and does the job. In the future you can update it and get better keys and better housing for the whole board, add blinking lights and so on. This was just fun DIY project which is also something really usefull.